
Gravity View WordPress Plugin
Tired of keeping your Gravity Forms submissions hidden in the WordPress backend? GravityView is the ultimate solution that transforms your form entries into dynamic, front-end displays—perfect for directories, member profiles, job boards, and more. Best of all, you can download it for free under the GPL license from WPReel.com, making professional-grade data visualization accessible without cost.
This powerful plugin bridges the gap between form submissions and user engagement, allowing you to showcase, filter, and even edit entries directly on your website. Whether you’re managing a business directory, client portal, or event listings, GravityView turns raw data into interactive, user-friendly applications—no coding required.
Why Display Gravity Forms Entries on Your Website?
Gravity Forms collects valuable data, but without GravityView, that information remains locked in your WordPress dashboard. By displaying entries publicly, you unlock new possibilities for user interaction, content management, and community building.
Key Benefits of Front-End Entry Display
-
Enhanced User Experience – Visitors can browse, search, and interact with submissions without admin access.
-
Streamlined Workflows – Allow users to edit their own entries (e.g., updating profile info) directly on the front end.
-
SEO Boost – Structured data displays improve search visibility for directories or listings.
Key Features of GravityView
GravityView packs professional tools to customize how your form data appears:
-
Drag-and-Drop Builder – Design layouts visually by arranging fields, widgets, and custom content.
-
Multiple Layouts – Choose from Table, List, DataTables, or DIY templates for tailored displays.
-
Front-End Editing – Users can update their submissions with controlled permissions.
-
Advanced Filtering – Sort entries by date, category, or custom logic (e.g., “Show only approved entries”).
-
Social Sharing & SEO – Add share buttons and optimize entries for search engines.
-
Maps Integration – Plot entries on Google Maps for location-based directories.
How to Set Up GravityView in 4 Steps
1. Install & Connect to Gravity Forms
Download GravityView from WPReel.com, upload it to WordPress, and link it to your Gravity Forms plugin. Ensure both are activated and licensed.
2. Create a New View
Navigate to GravityKit > New View in your dashboard. Select a form as the data source and choose a layout (e.g., Table for spreadsheets, List for profiles).
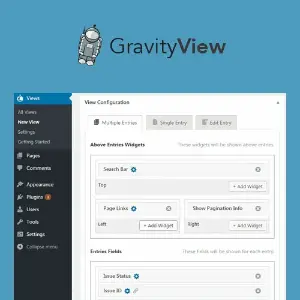
3. Customize the Display
Use the drag-and-drop editor to add fields, widgets (like search bars), and even HTML snippets. Configure permissions to control who can view or edit entries.
4. Embed the View
Place your creation anywhere using the [gravityview] shortcode or Gutenberg block. Test it to ensure filters, editing, and displays work smoothly.
“GravityView saved us 40+ hours a month by automating our client portal—now customers update their own profiles!” – A satisfied agency owner.
Creative Uses for GravityView
Beyond directories, this plugin adapts to countless scenarios:
-
Job Boards – List openings with filters for location/role; let employers manage postings.
-
Nonprofit Donor Walls – Publicly honor contributors while keeping amounts private.
-
Educational Portals – Students submit assignments; teachers grade them front-end.
-
Restaurant Menus – Display dishes with dietary filters and daily specials.
Where to Download GravityView for Free
Get the GravityView plugin under the GPL license at no cost from WPReel.com. The GPL license grants freedom to use, modify, and redistribute the plugin as needed.
Share